

Let GC guide you for the restoration of indirect partial restoration with our smart solutions and tips & tricks!
4. Luting
an indirect partial restoration is an essential step for ensuring long-term stability and success of the restoration. Luting can be a particularly stressful process for a clinician as it demands precision, speed and careful selection of the luting cement.
Step-by-step
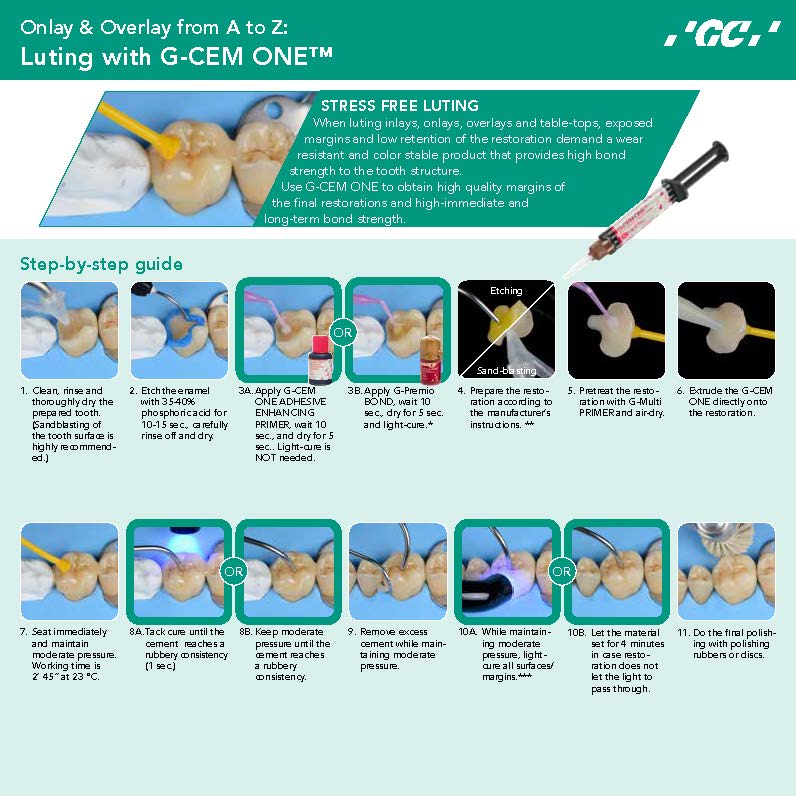
Having low retention and visible margins, indirect partial posterior restorations demand a luting product with high bond strength, wear resistance and color stability. The universal luting solution G-CEM ONE is your first choice for luting in these indications. Use it with G-CEM ONE Adhesive Enhancing Primer or G-Premio BOND when extra adhesion is needed. When the preparation (e.g. for an overlay) provides sufficient retention/resistance, this step can be omitted all together.
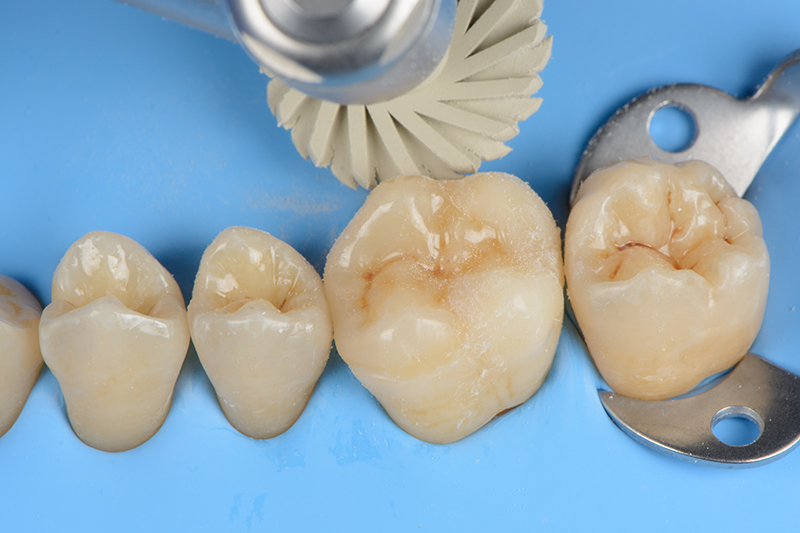
1. Clean, rinse and thoroughly dry the prepared tooth. (Sandblasting of the tooth surface is highly recommended.)

2. Etch the enamel with 35-40% phosphoric acid for 10-15 sec., carefully rinse off and dry.
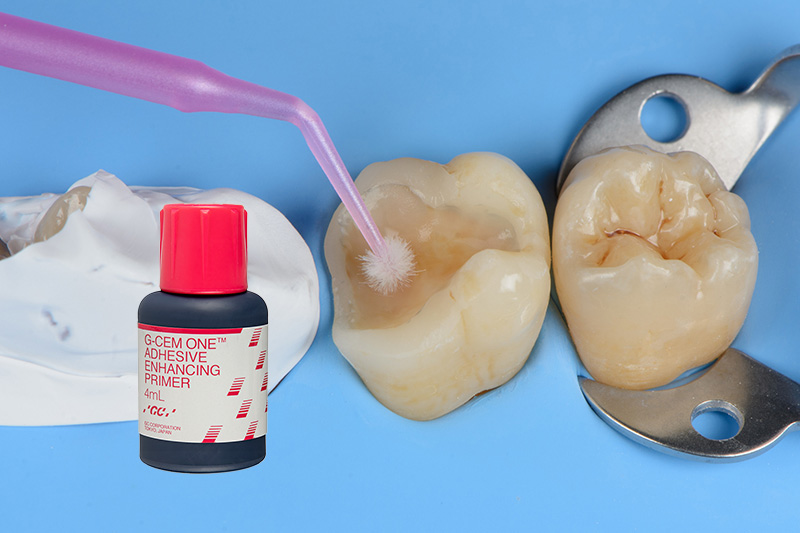
3A. Apply G-CEM ONE ADHESIVE ENHANCING PRIMER, wait 10 seconds, and dry for 5 seconds. Light-cure is NOT needed.


3B. Apply G-Premio BOND, wait 10 seconds, dry for 5 seconds and light-cure.
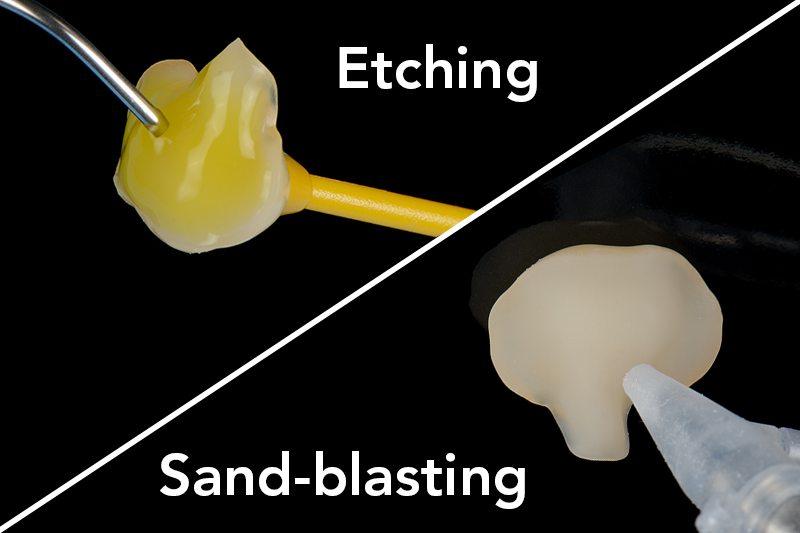
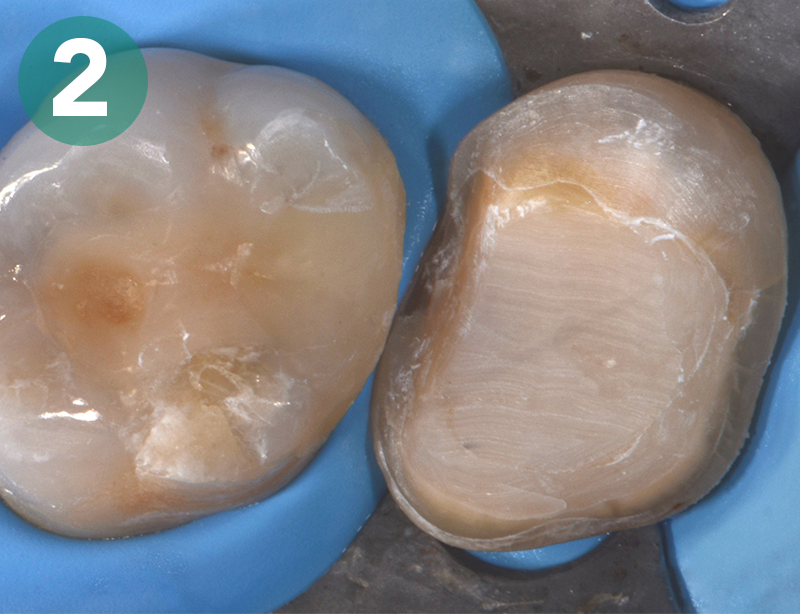
4. Prepare the restoration according to the manufacturer’s instructions
(etching and/or sandblasting).
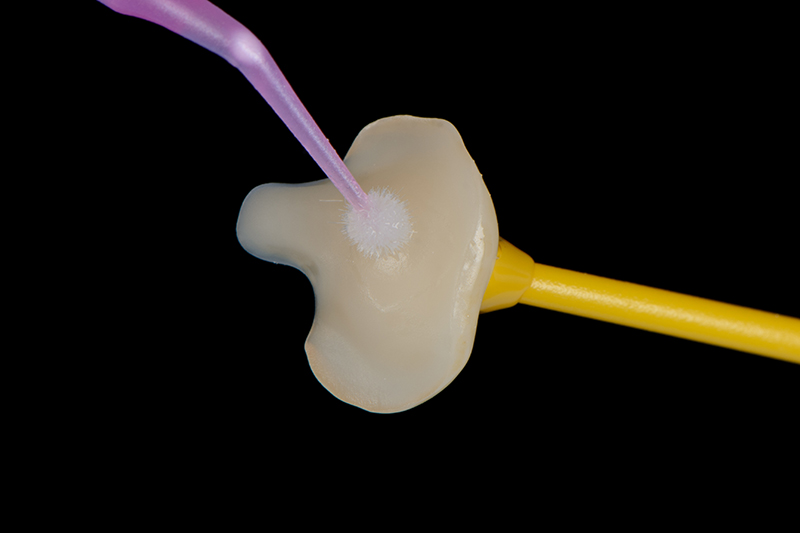
5. Pretreat the restoration with G-Multi PRIMER and air-dry.

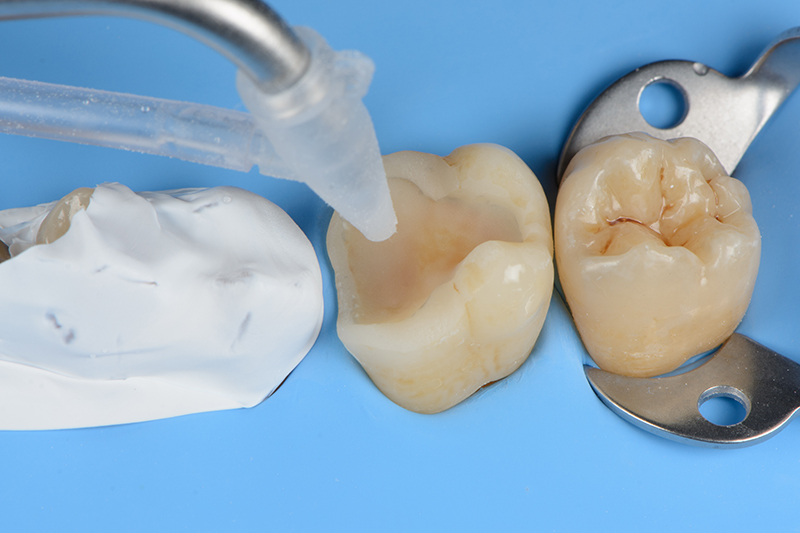
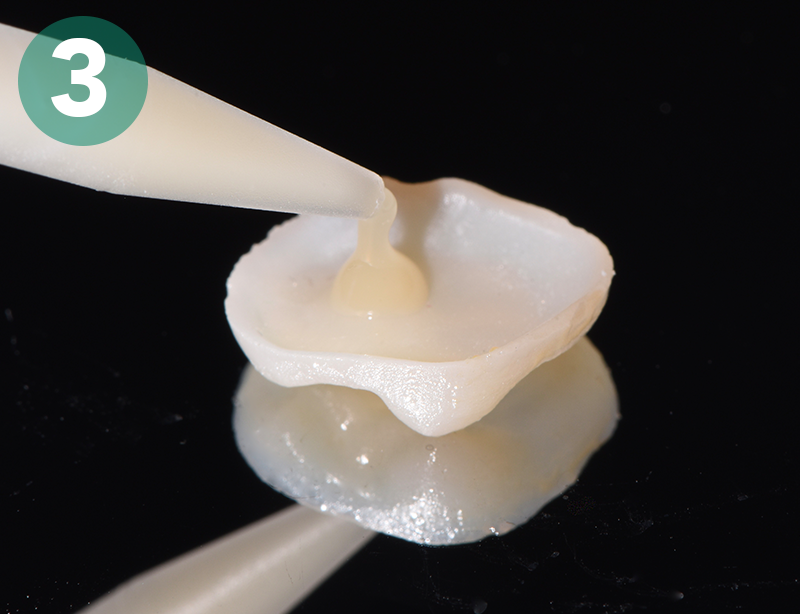
6. Extrude G-CEM ONE directly onto the restoration.

7. Seat immediately and maintain moderate pressure. Working time is 2‘ 45“ at 23 °C.
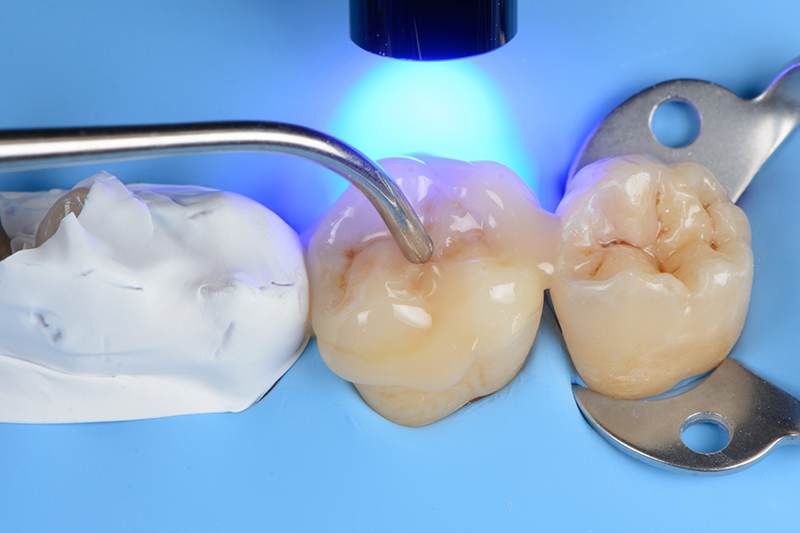
8A. Tack cure until the cement reaches a rubbery consistency (1 sec.)
8B. Keep moderate pressure until the cement reaches a rubbery consistency.
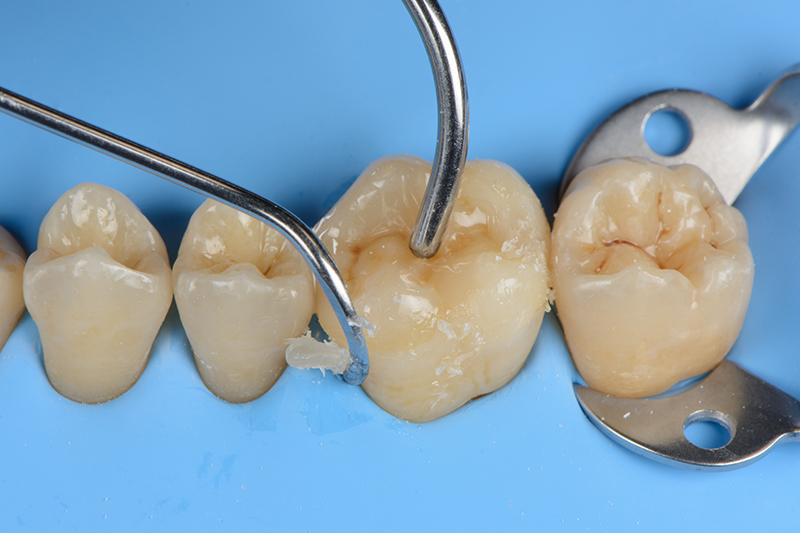
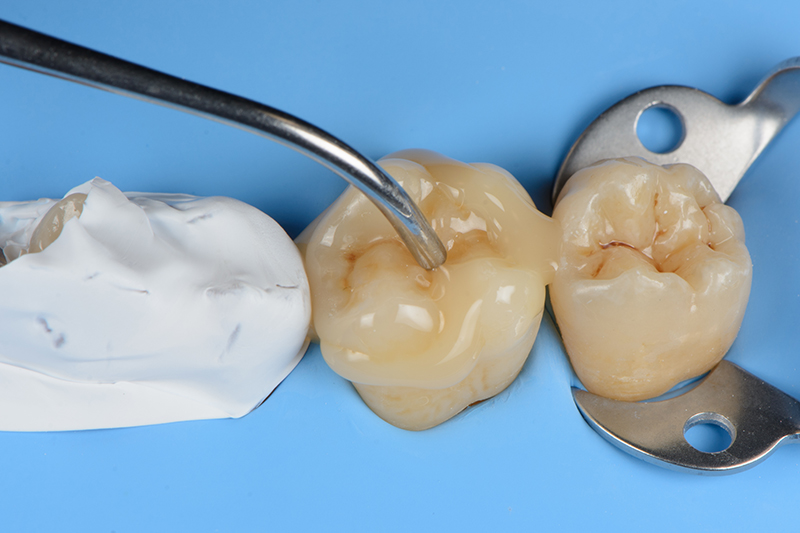
9. Remove excess cement while maintaining moderate pressure.
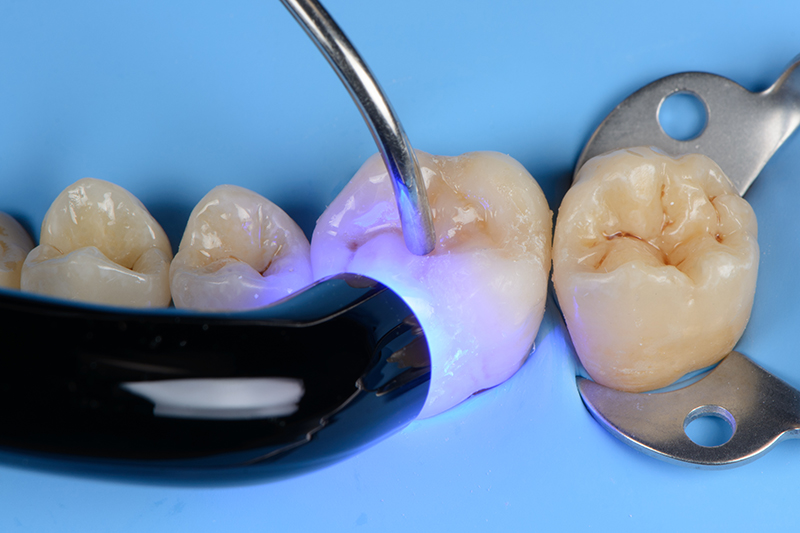
10A. While maintaining moderate pressure, light-cure all surfaces/ margins.

10B. Let the material set for 4 minutes in case restoration does not let the light to pass through.
11. Do the final polishing with polishing rubbers or discs.
Tips & tricks for a perfect luting
of inlays & overlays

- Sandblasting of the tooth surface before luting is highly recommended.
- Shake the bottle of G-Premio BOND before using
- Using G-CEM ONE AEP reduces the working time!
- Tack cure G-CEM ONE for 1 second only to ease the excess removal!
- When drying G-CEM ONE AEP and G-Premio BOND use maximum air pressure to avoid pooling of the liquid in the gingival sulcus
- Make sure to maintain moderate pressure on the restoration throughout the setting time, especially during excess removal.

Clinical cases
Initial LiSi Block -overlay hampaassa 37, joka on sementoitu G-CEM ONE:lla ja G-CEM ONE AEP:llä
Tohtori Riccardo Tempesta (Italia) luvalla

Alkuperäinen tilanne
Preparointi ja sidostaminen
G-CEM ONE AEP-tuotteella
G-CEM ONE:n pursottaminen

Lopputulos
Videos
Downloads
Articles


Articles
Articles
FAQ

What etching protocol should I use?
When using G-CEM ONE system, any etching protocol can be used. Enamel etching is always recommended.
How should I remove the excess of G-CEM ONE?
You can remove the excess of G-CEM ONE easily by either tack curing technique or with a brush.
In tack curing technique process light-cure (tack cure) the restoration for 1 second. This will cause the cement to partially set and get a rubbery consistency. Then, use a scaler or an explorer and gently remove the excess cement. Be careful not to displace the restoration – maintain moderate pressure on the restoration with a ball instrument or a finger.
Another option is removing the excess cement with a brush, such as modeling brush or microbrush. Maintain moderate pressure on the restoration and carefully brush away the excess cement. Optionally, the brush can be dipped into modeling liquid.
After removing the access light-cure the restoration to achieve full setting of G-CEM ONE or wait for self-curing of the cement while maintaining pressure on the restoration.
What is the working time of G-CEM ONE?
Working time of G-CEM ONE is 2 min 45 seconds at 23°C. Please not that working time is reduced when G-CEM ONE Adhesive Enhancing Primer is used.
What do I do if I cannot reach the restoration well with the curing light?
G-CEM ONE is a dual cure luting cement and features an excellent dark-cure capability, so it will achieve high rate of polymerization even in absence of light. If you want to light-cure the cement and the access of the curing light to the restoration is limited to a point where the light guide of the curing light is more than 10mm away from the restoration, increase the time of light curing.
Related products

G-CEM ONE Kit
Universal self-adhesive resin cement system

G-CEM ONE Universal kit
Universal self-adhesive resin cement system with optional Universal Bonding G-Premio BOND
